¶ Big Red - Lens Cleaning Procedure
This is the procedure to clean the laser head lens on "Big Red", our LC1290 laser cutter.
This procedure is for use by trained laser maintainers.
Do not perform this task unless you have been specifically trained.
Laser cutters use a lens to focus a wide beam of energy down to a focused point.
The lens needs to be cleaned frequently to remove dirt (smoke, etc) which reduces the amount of power getting through the lens.
¶ Objectives
- Disassemble the laser head assembly to access the lens
- Clean the lens
- Reassemble
- Test Z-probe and laser cutting after re-assembly.
¶ Laser head anatomy

¶ Equipment
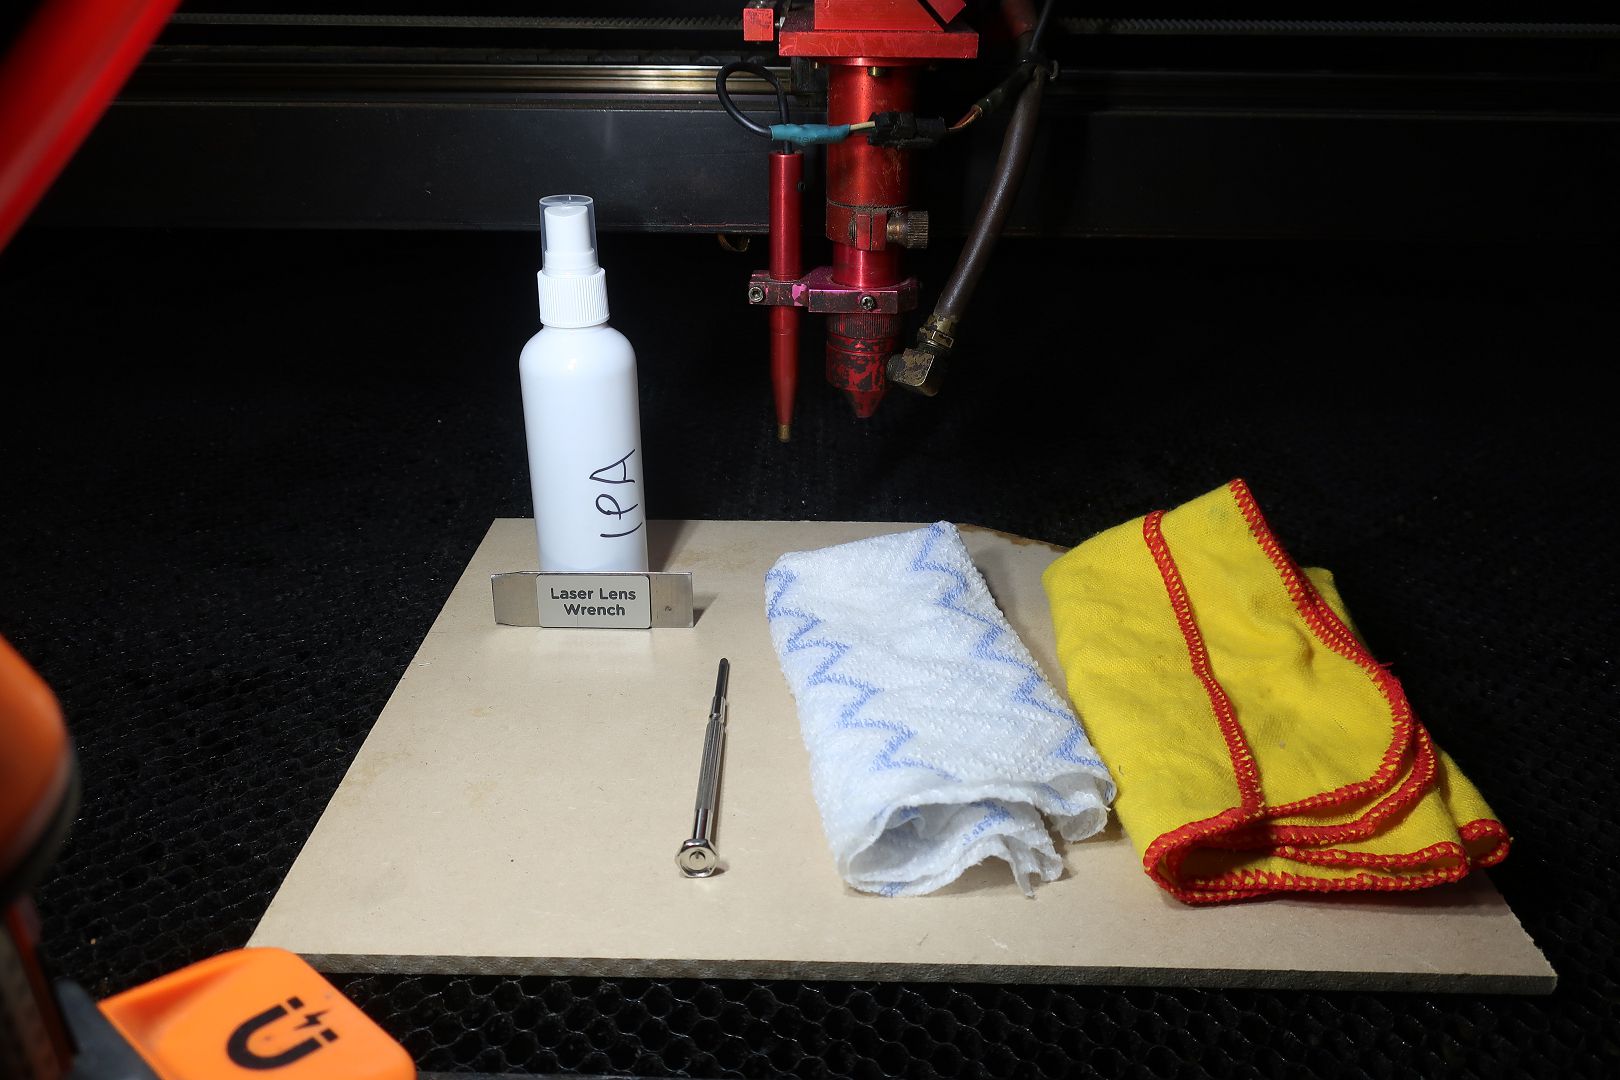
Specialised equipment needed for this task is located in the laser maintenance toolbox.
The combination for the lock on the toolbox is given to people who have been trained in laser maintenance procedures.
You will need:
- An A4-sized piece of material to use as a working surface.
- The "laser lens wrench"
- A small phillips head screwdriver
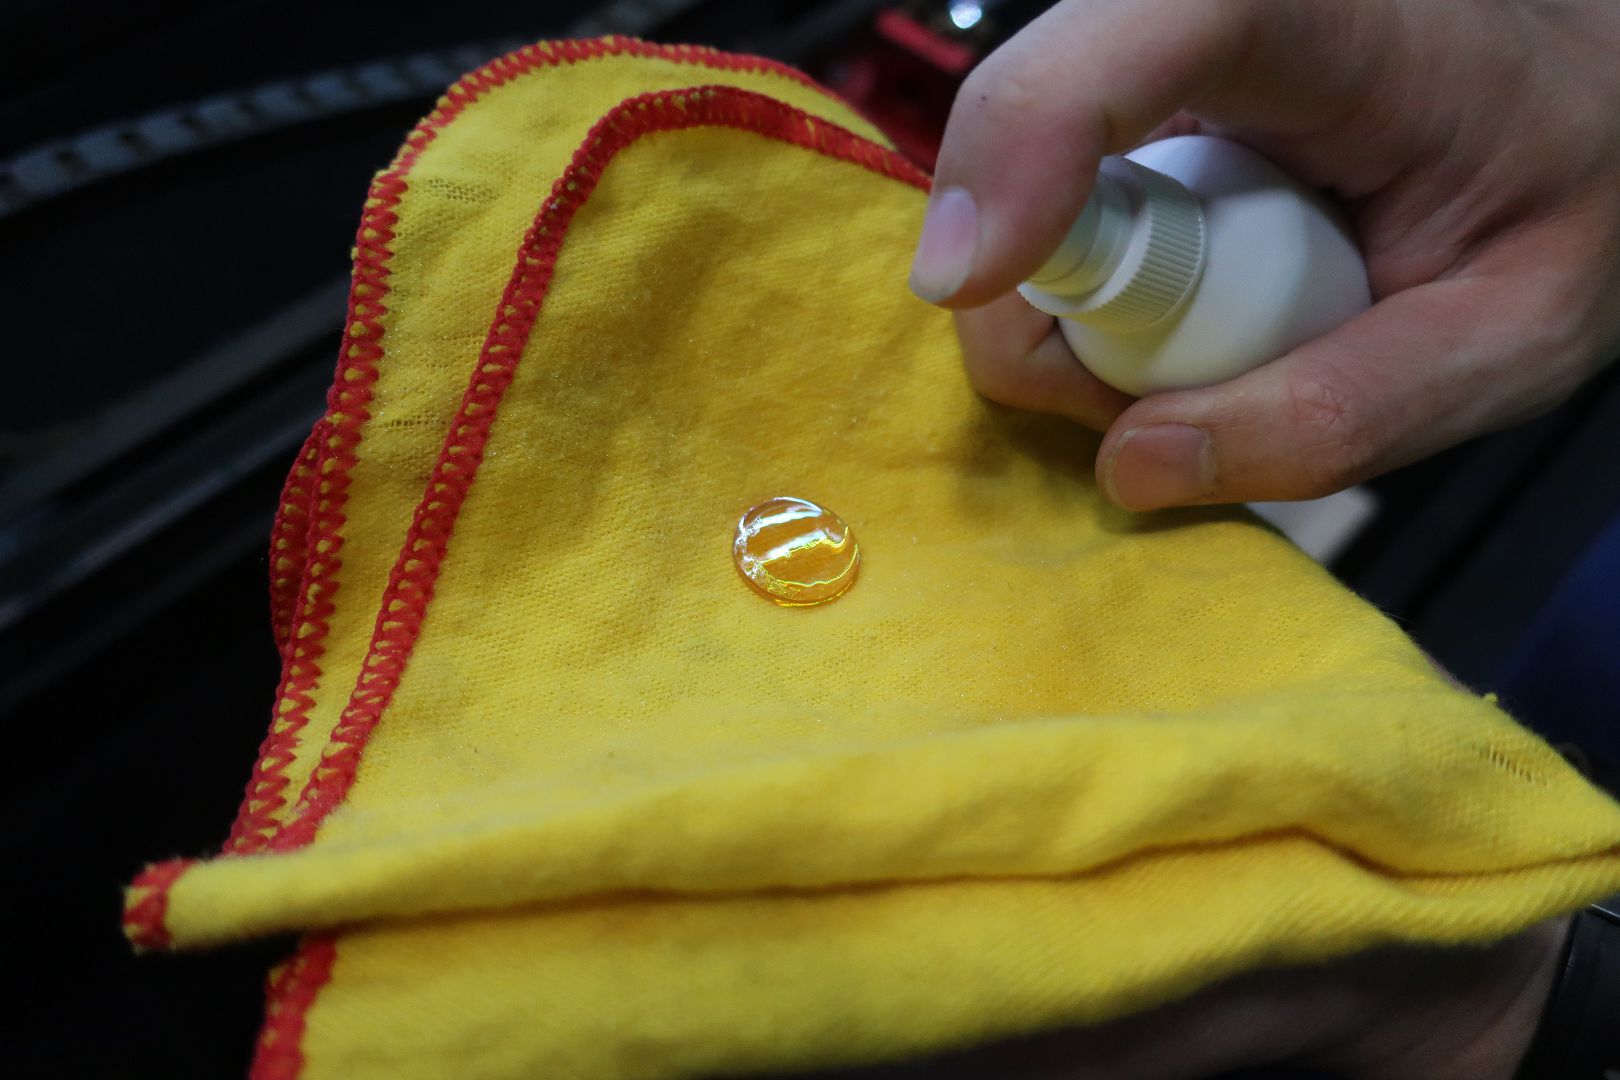
- A spray bottle of isopropyl alcohol (IPA)
- Polishing cloths
¶ Procedure
-
Start the laser.
-
Evaluate the current cutting speed of the laser on 3mm MDF.
- Use the test files
LC1290-bigred-25--50.ecporLC1290-bigred-40--60.ecplocated in\\filer\Member Work\Fletcher Boyd\Resources\Lasers\laserspeeds\. - The "cut speed" of the laser corresponds to the cut rectangle that falls out immediately with no force applied.
- Use the test files
-
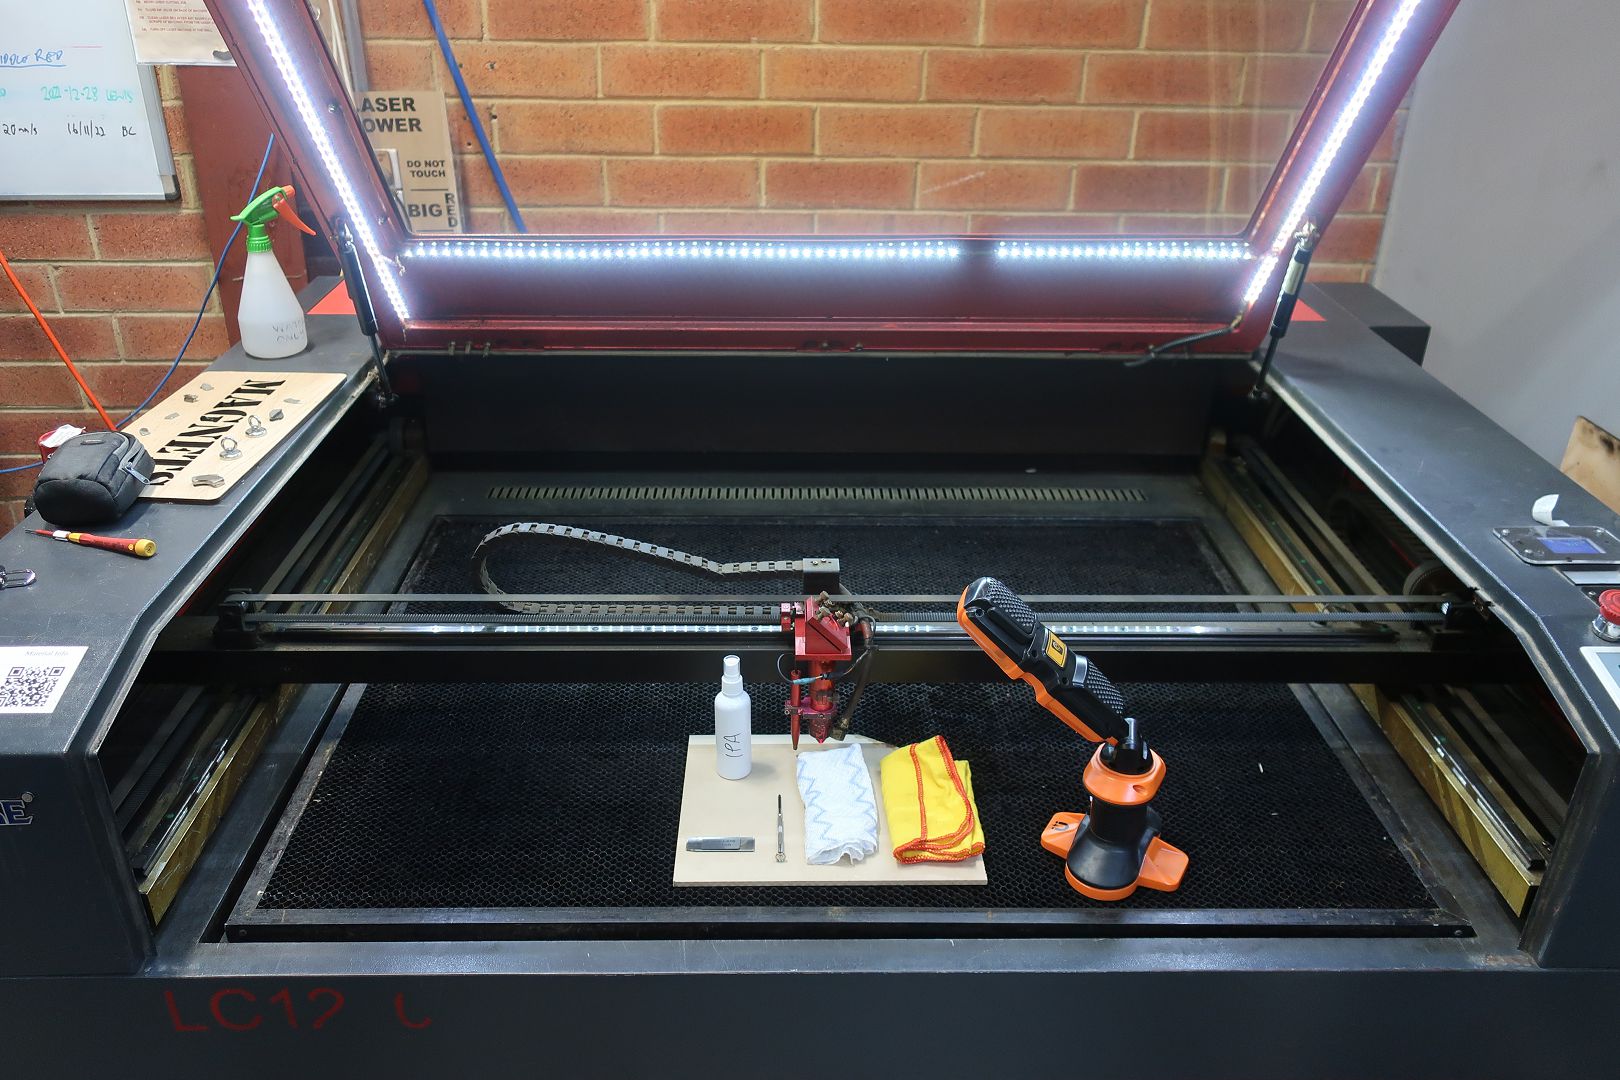
Drive the laser head to the front and centre of the bed, so you can reach it easily.
-
Manually drive the Z-axis down to create working space underneath the laser head.
-
Put the A4 piece of material under the head. This creates a clean working surface for parts to lie on, and catches any small parts you may drop.
-
Disassemble the laser head -
- Loosen (do not remove!) the two screws securing the Z-probe to the lens tube.
- Loosen the thumb-screw securing the lens tube.
- Unscrew the air assist nozzle from the lens tube.
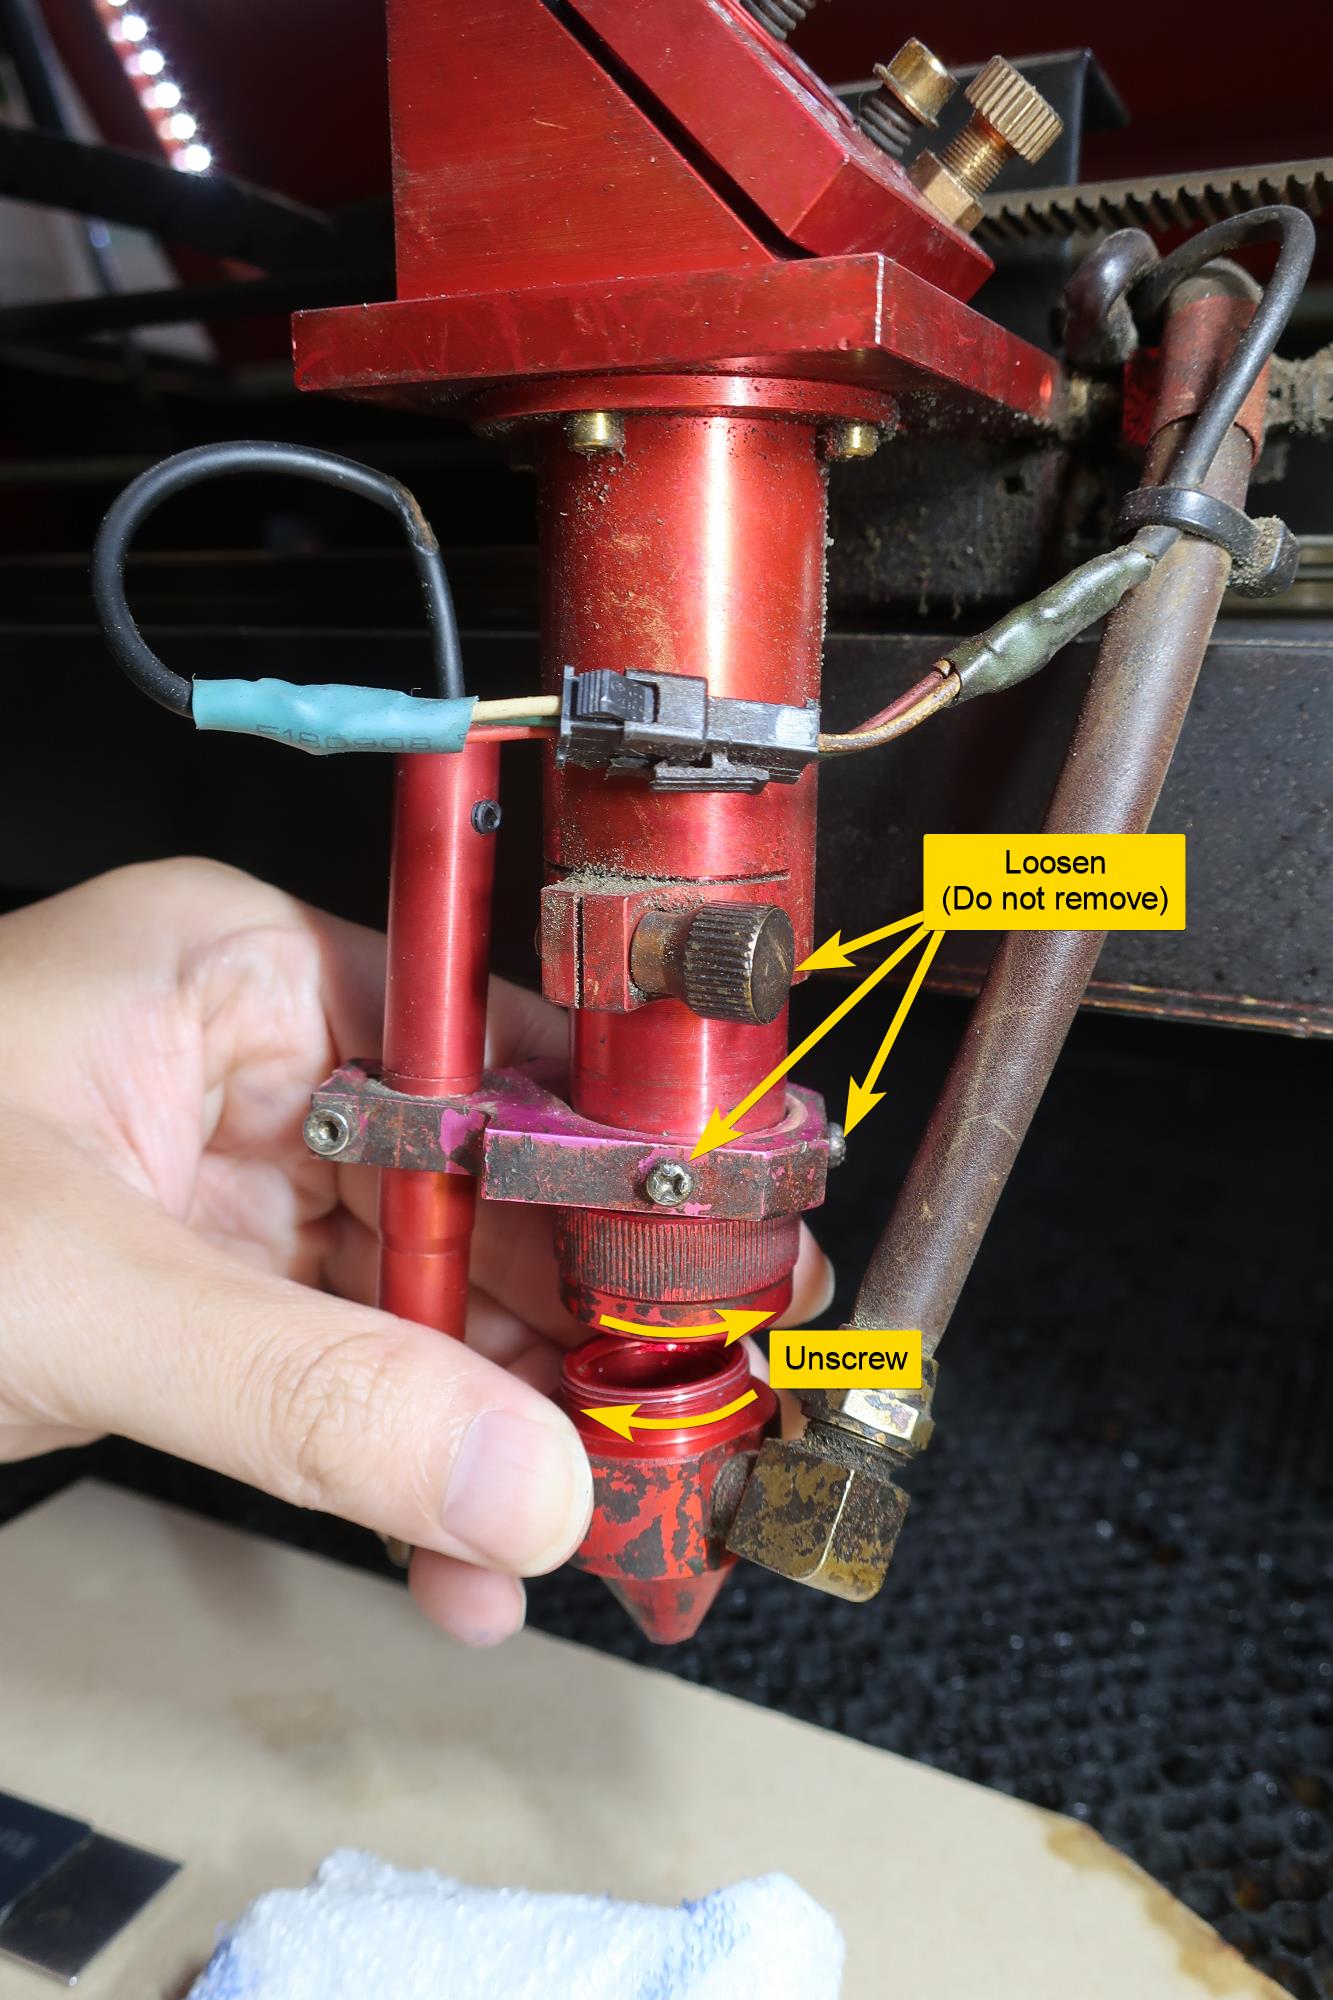
- Use the laser lens wrench to unscrew the ring which holds the lens in the lens tube. Be careful not to scratch the lens.
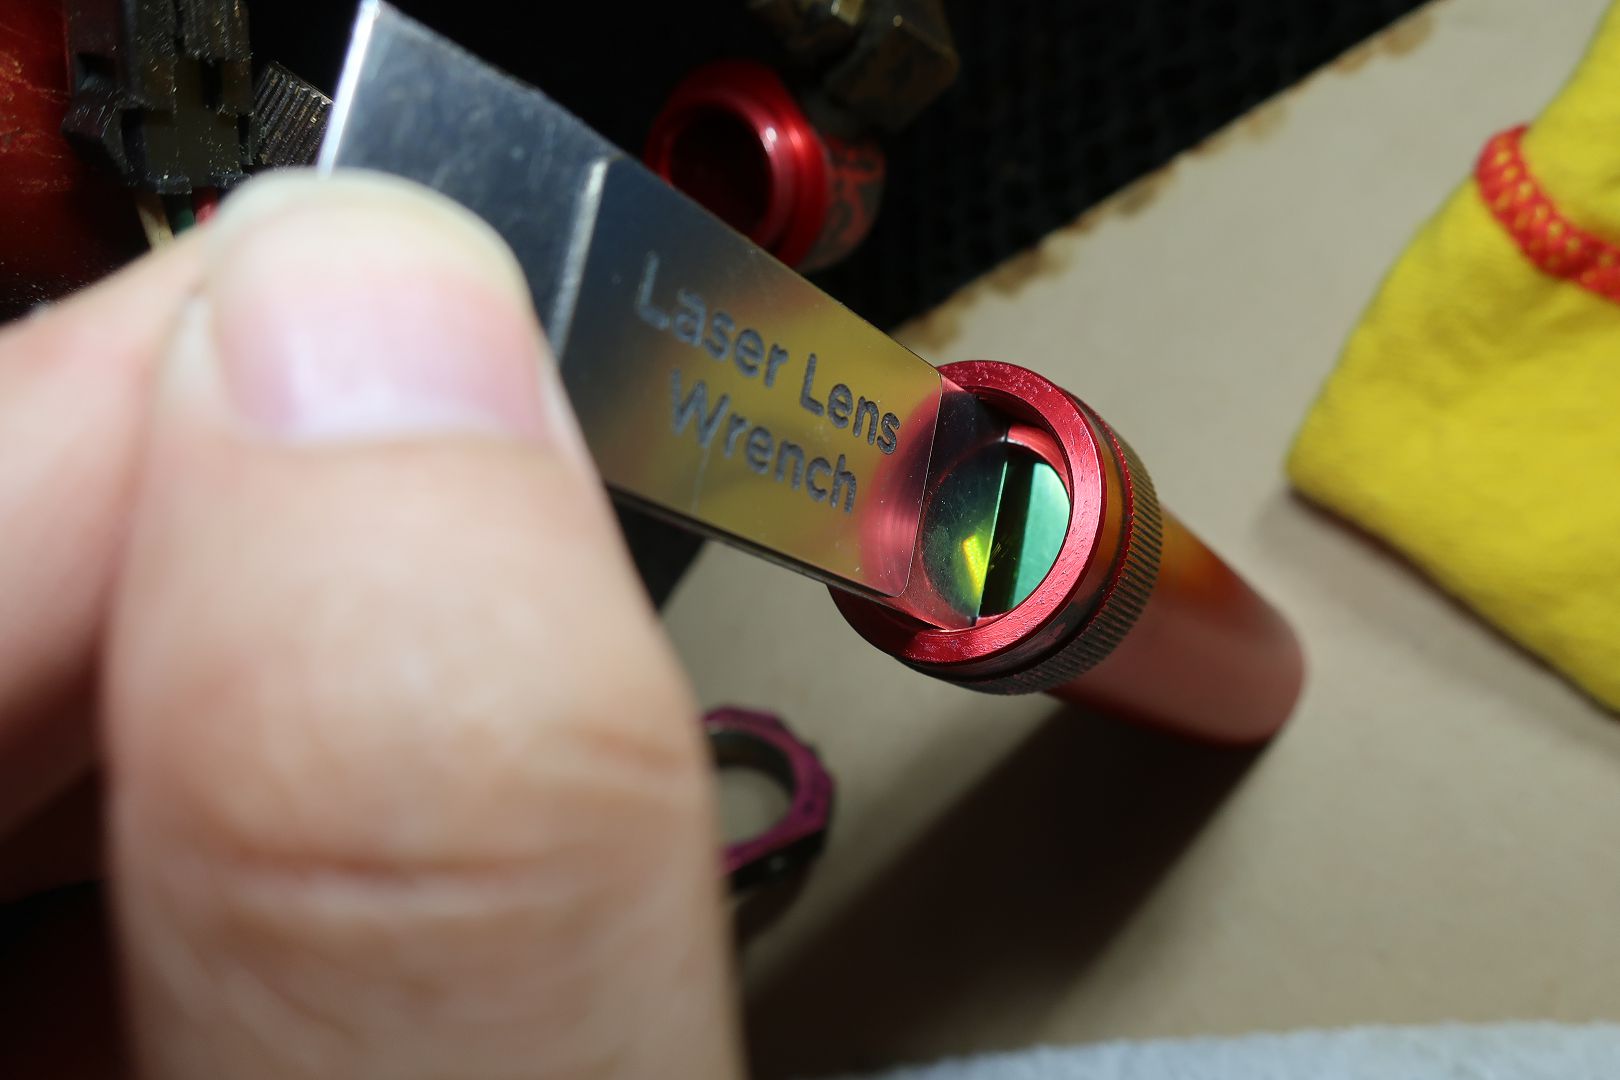
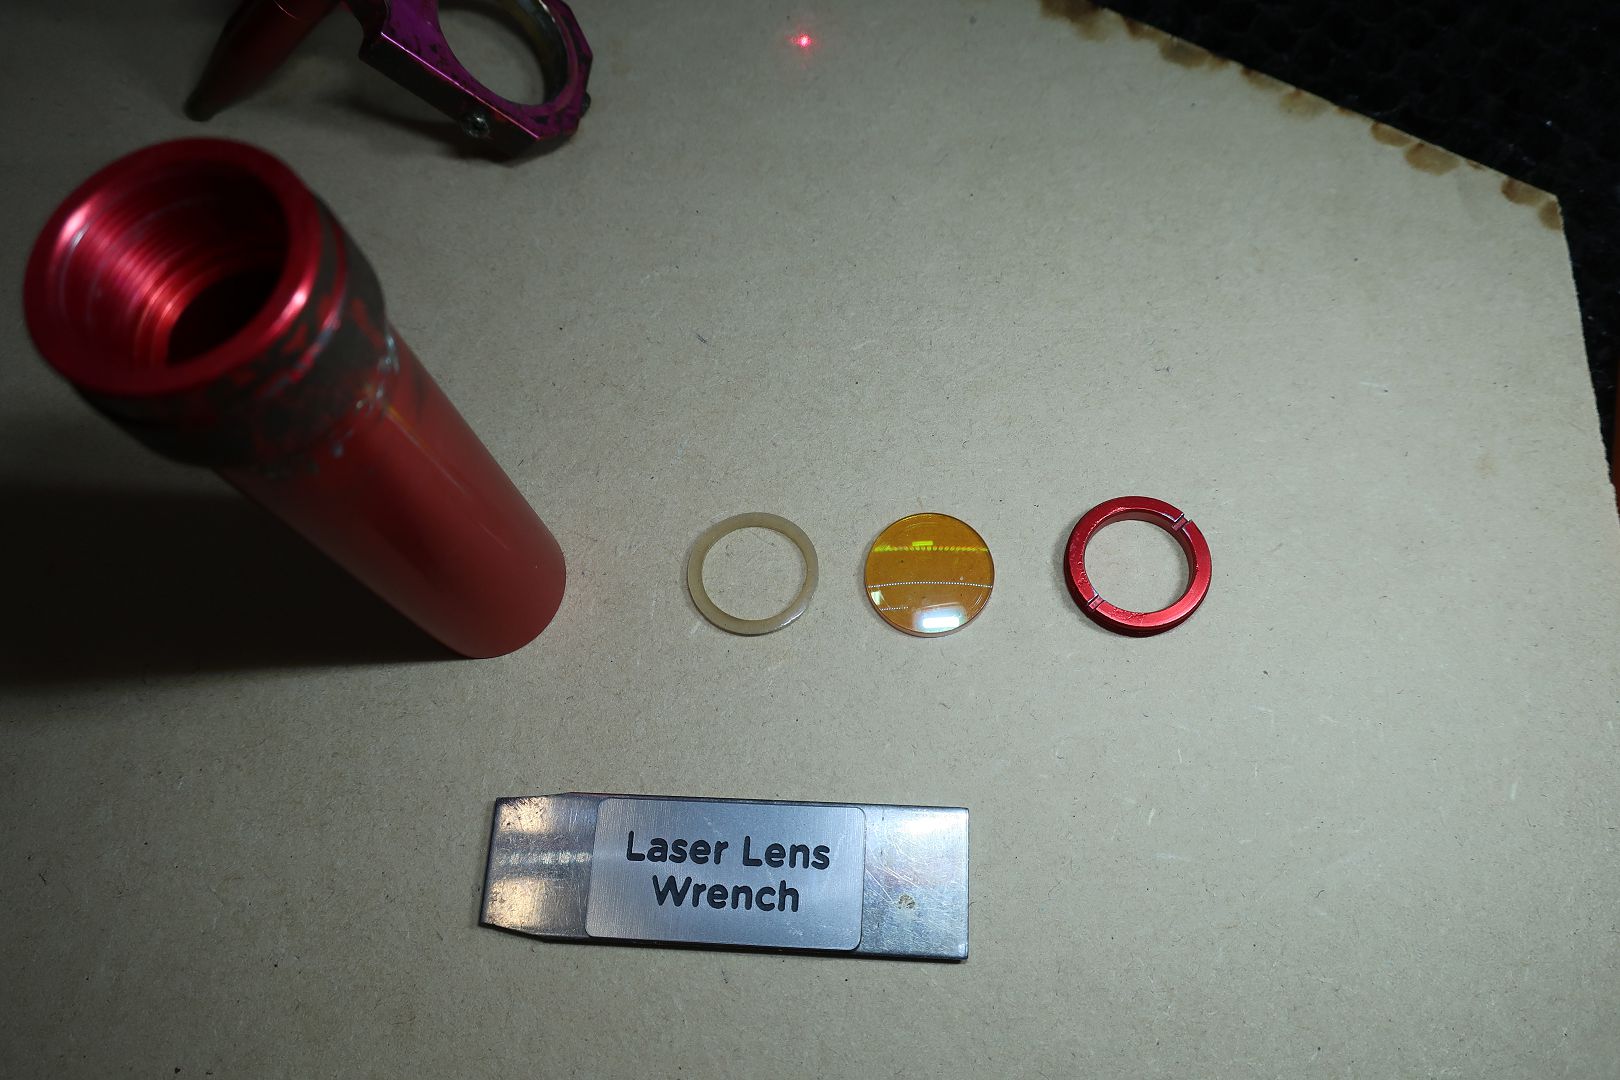
- Clean the lens with a soft, lint-free cloth, and copious amounts of isopropyl alcohol. Repeat until lens is clean.
-
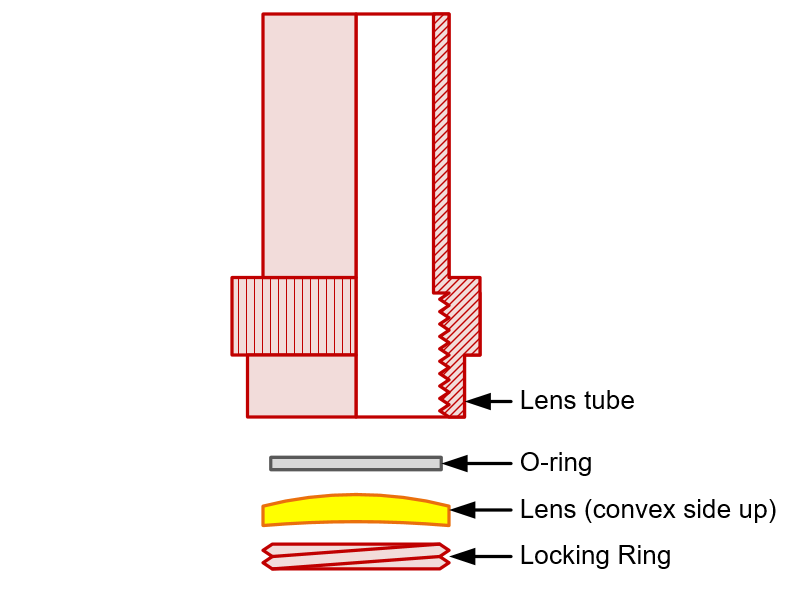
Reassemble the lens, O-ring and locking ring back into the lens tube.
- Note the orientation of the lens - convex side up (away from the work), concave side down (towards the work).
-
Reassemble the Z-probe, lens tube, and air assist nozzle.
-
Re-tighten the screws that hold the Z-probe to the lens tube. Ensure the z-probe holder is tight against the shoulder on the lens assembly. This sets the focal length of the laser.
-
Wiggle the Z-probe / z-probe bracket to ensure it is securely fixed to the lens tube. Re-tighten the screws if required.
-
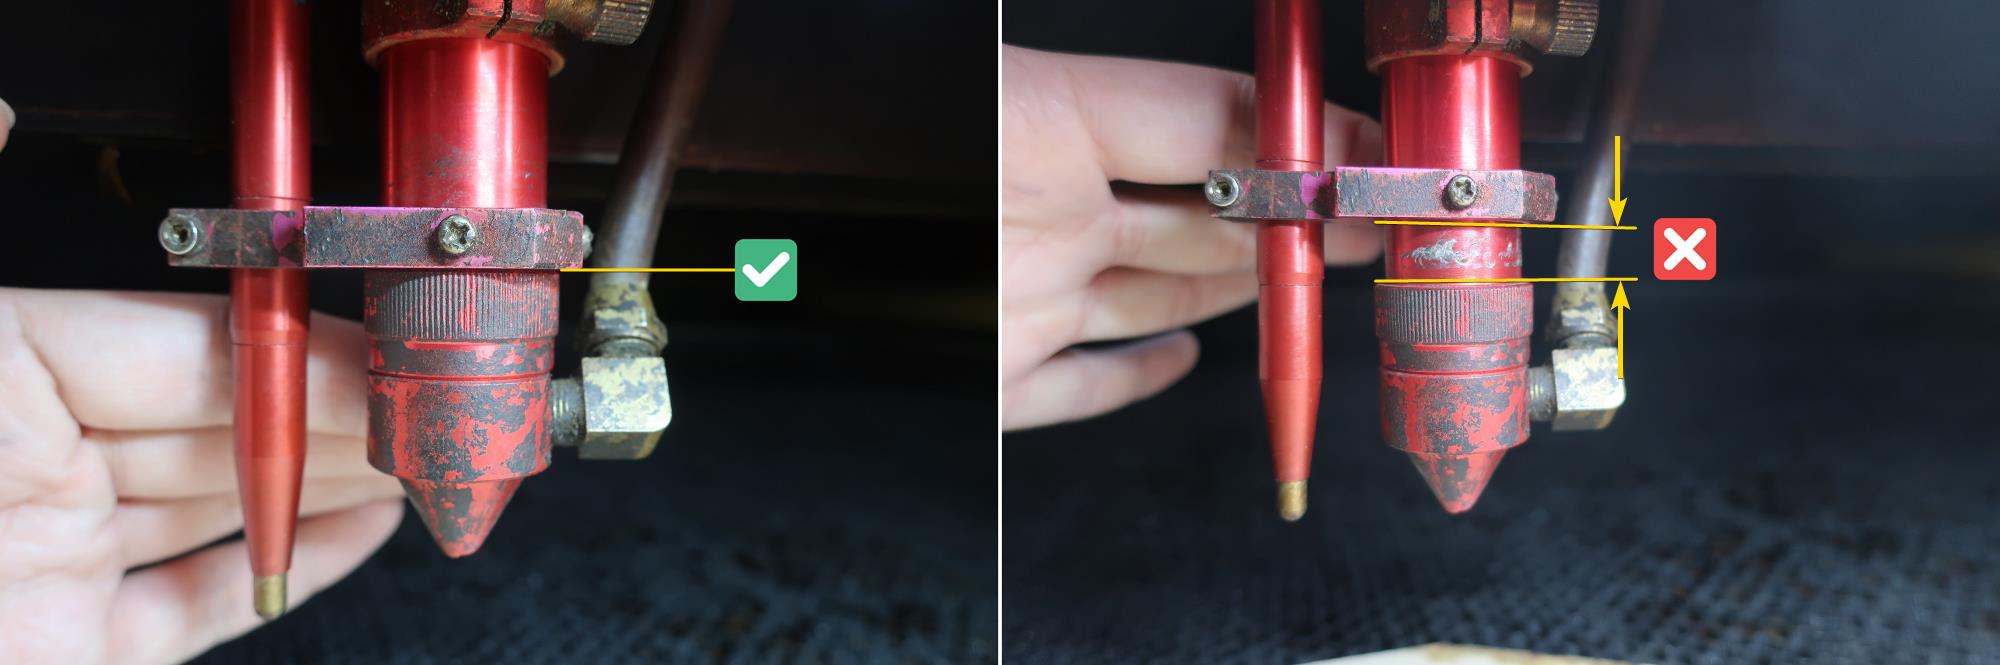
Re-tighten the thumb-screw that holds the lens tube and Z-probe on the head. Leave 20mm of spare space as indicated - this will make it easier to recover from head crashes if required.

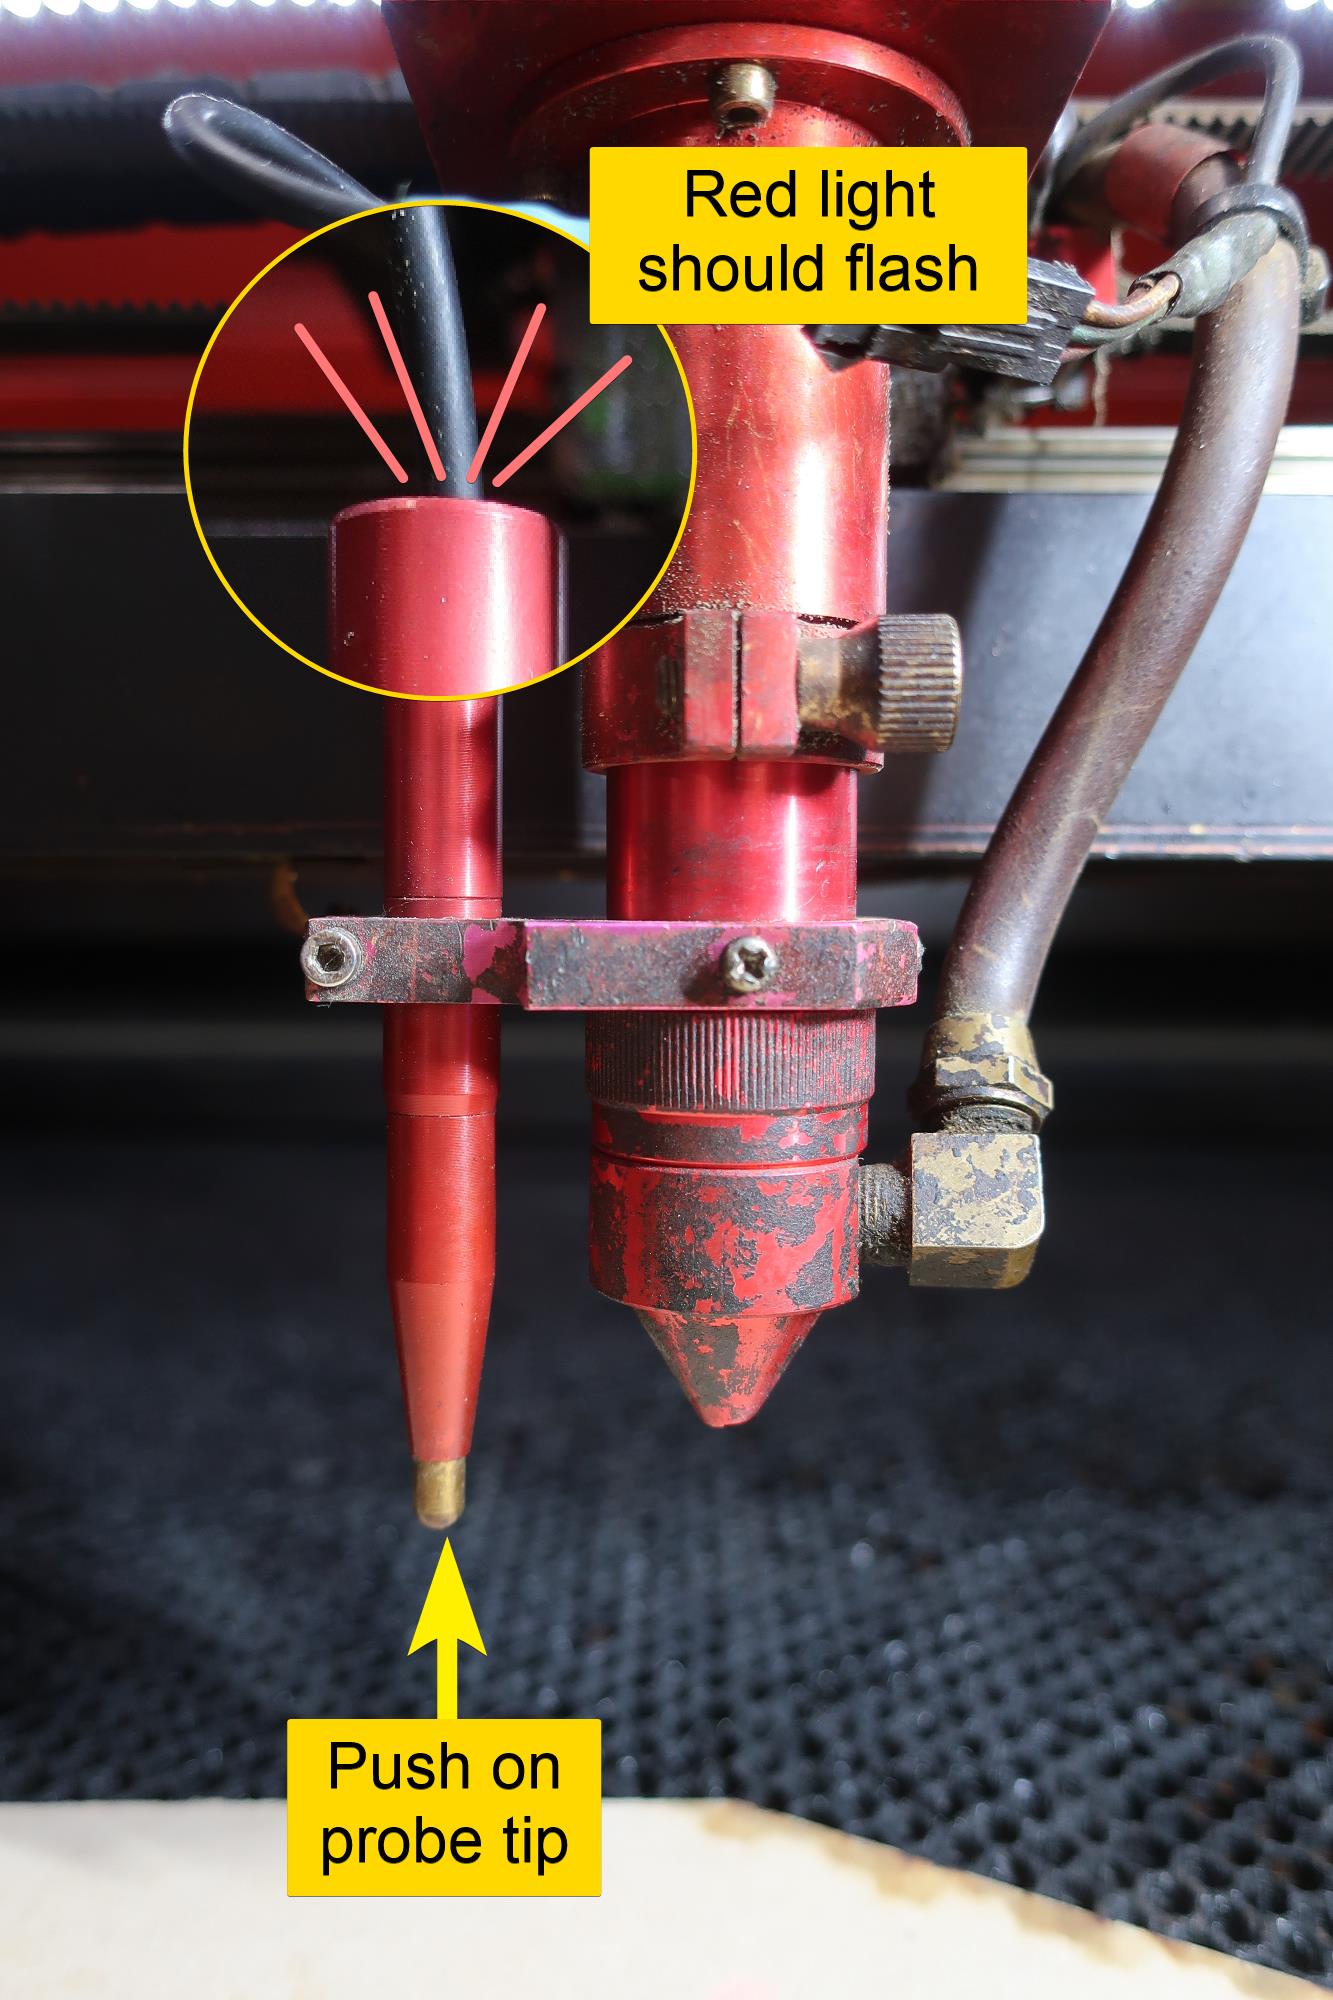
- Check the Z-probe for function. (Push the Z-probe button up; a red light should illuminate on the back of the Z-probe.)
-
Z-datum the machine. After maintenance there is a increased risk of the Z-probe failing - so really ensure you are ready to E-stop the machine!
-
Perform another speed test on 3mm MDF and record the result.