¶ WK 1360 (a.k.a. MH 1351) Vinyl Cutter
¶ Summary
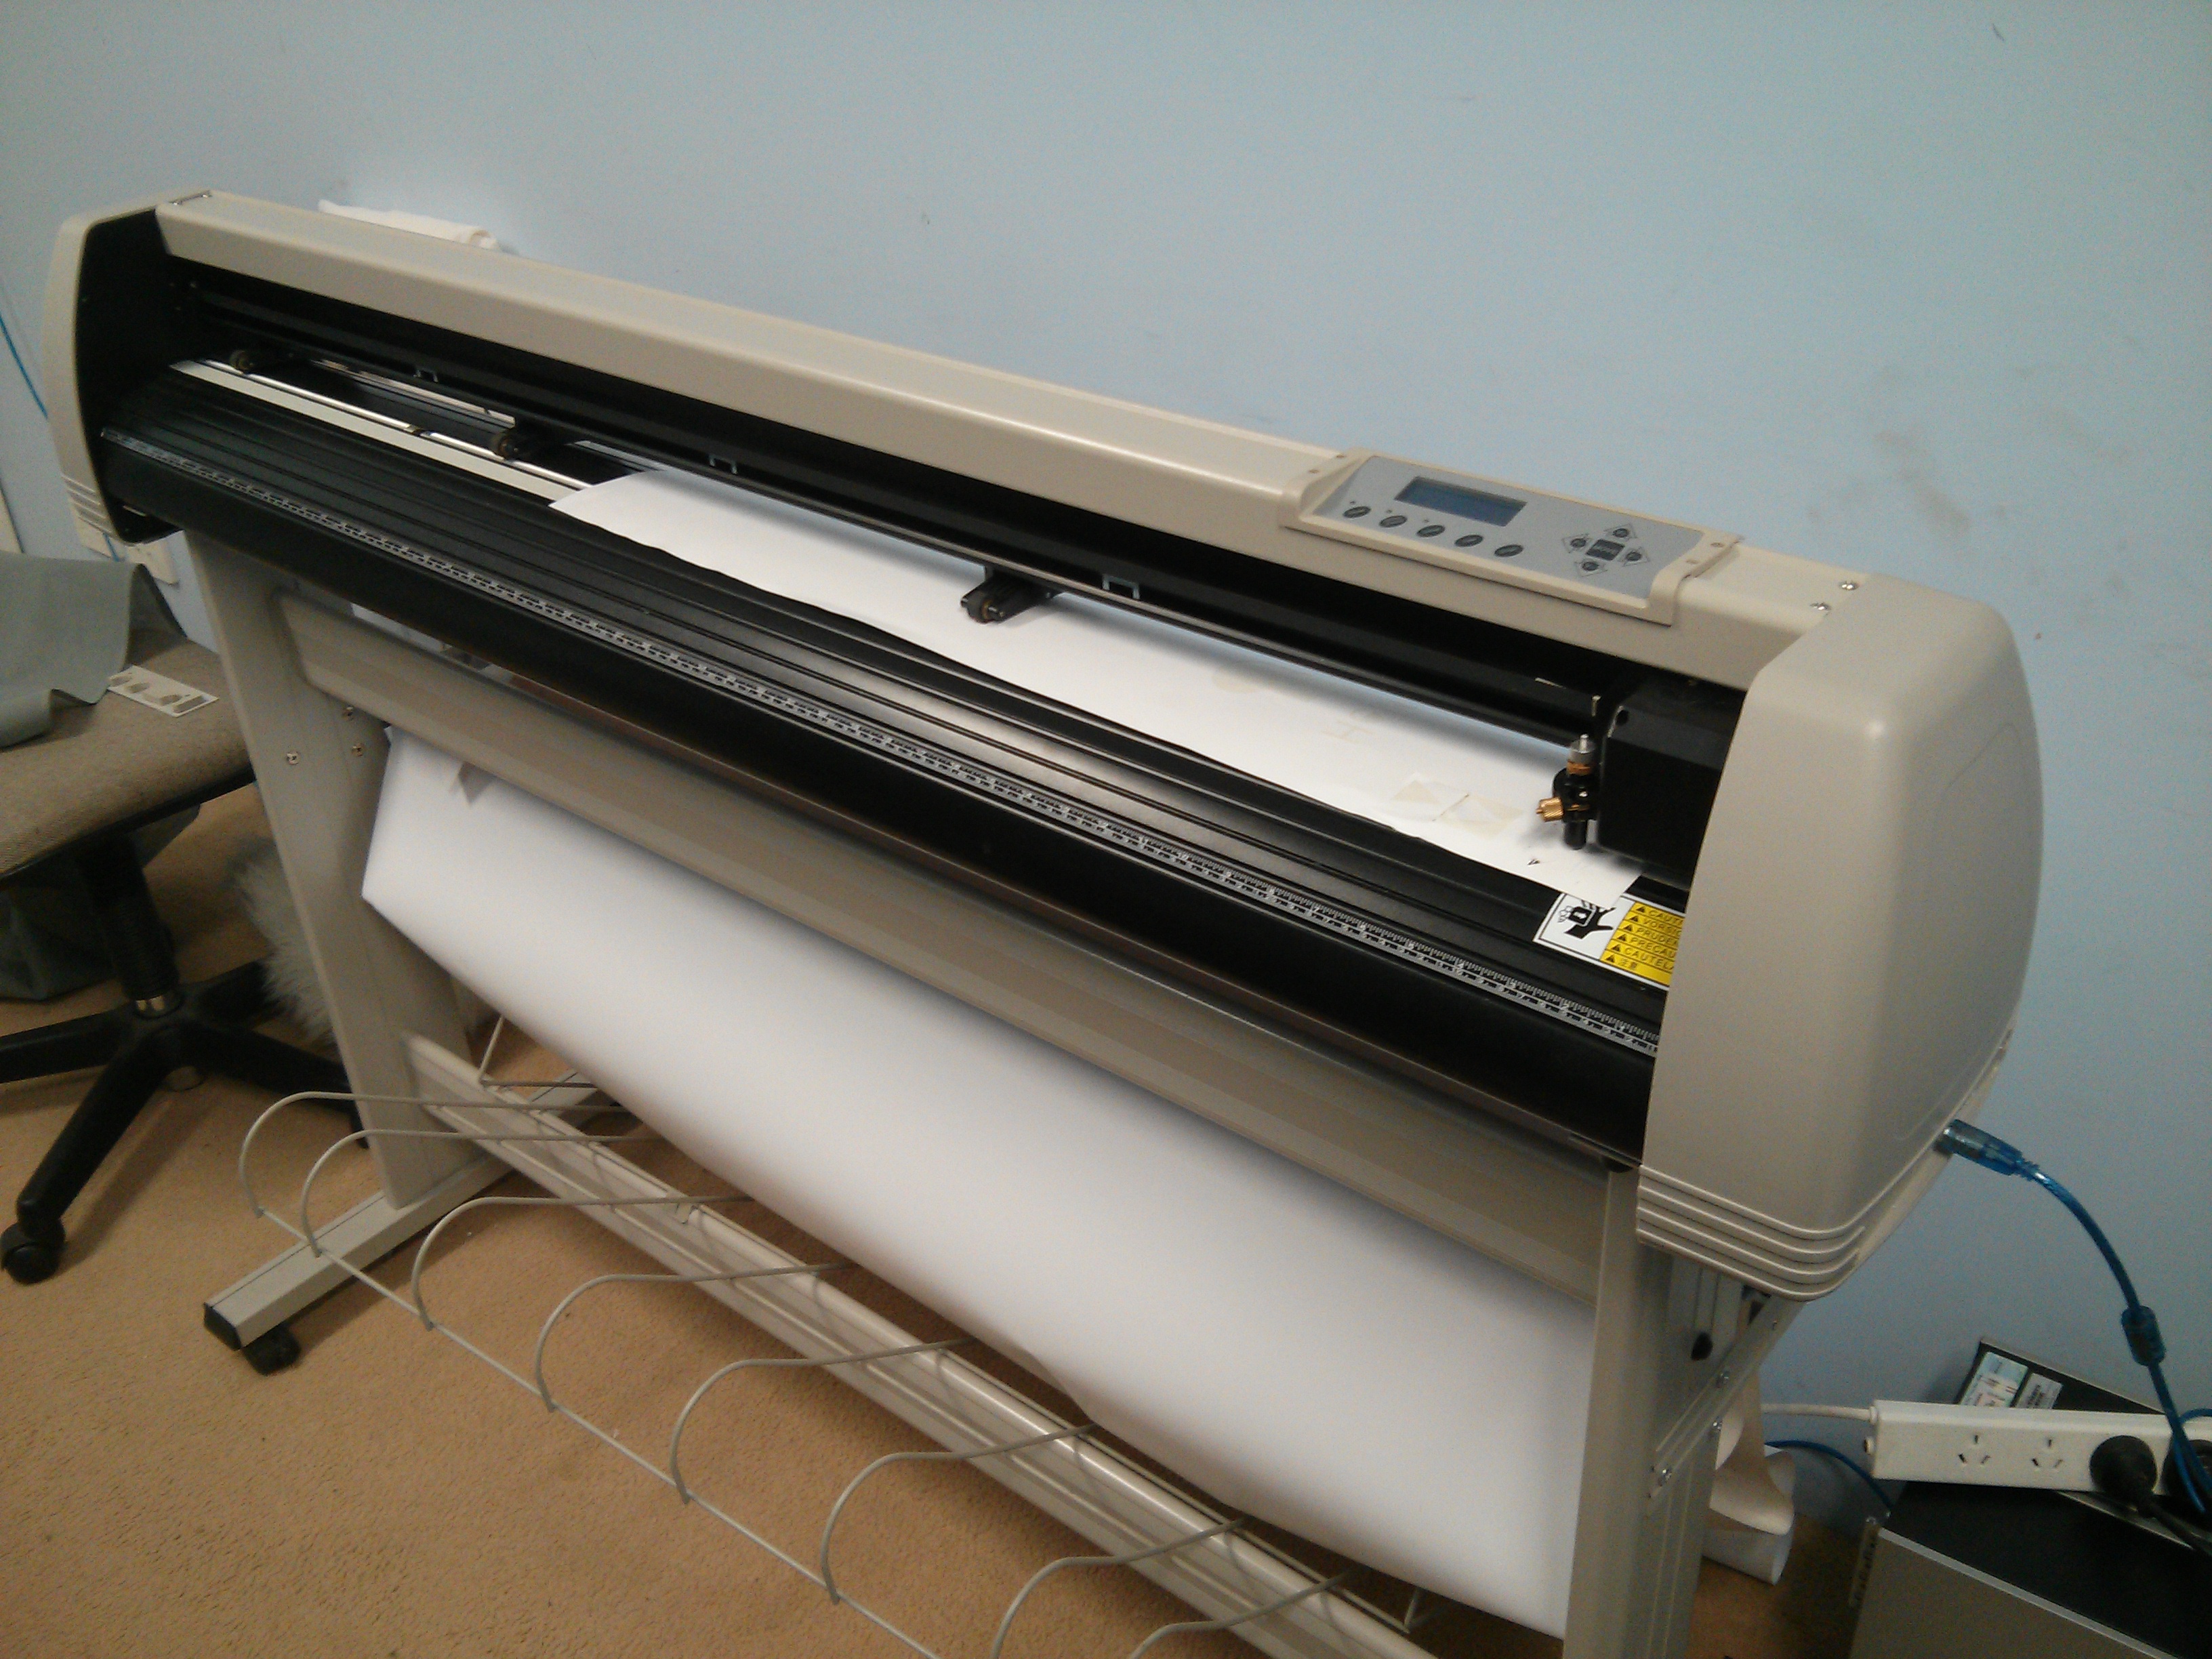
The vinyl cutter uses a sharp blade to automatically cut out vinyl stickers or templates.
¶ Documentation
This vinyl cutter is known by a number of model numbers e.g. WK 1360, MH 1351, and so on.
OEM manual (Chinglish): wk1360_operation_manual.pdf
Better 3rd party manual (US Cutter): mh_manual_09172019.pdf
¶ Hazards
The vinyl cutter is a relatively safe tool when used correctly.
 |
Sharp Blades | The blades used in the vinyl cutter are extremely sharp. Do not handle without protective caps installed. |
 |
Rotating Parts & Belts | The cutter can move quickly and unexpectedly, avoid having hands or other appendages close to the machine whilst it is operating. |
¶ PPE Required
 |
Clothing Requirements | No special clothing requirements apply for this machine. |
 |
Footwear | Enclosed footwear is recommended |
¶ Approved Users
You must be trained to use this tool.
¶ Trainers
- Lewis Yip
Training for this machine is organised via #training_and_inductions on Slack.
¶ Users
- An up to date list of authorised operators can be found here.
¶ Specifications
| Maximum Cutting Width | 1,260 mm |
| Maximum Media Width | 1,360 mm |
| Maximum Cutting Speed | 500 mm/sec |
| Maximum Blade Cutting Force | 400 g |
¶ Instructions for Use
The vinyl cutter is connected to the PC that is closest to it.
The PC has Inkscape installed, which you will use to prepare your design and send it to the vinyl cutter.
¶ Preparing the Machine
-
Refer the US Cutter manual, pages 12 - 24.
-
Load material
- Refer pp19-21 of the US Cutter Manual - Preparing for Cutting.
-
Adjusting the position of where the cut will be made
- Refer p22 of the US Cutter Manual.
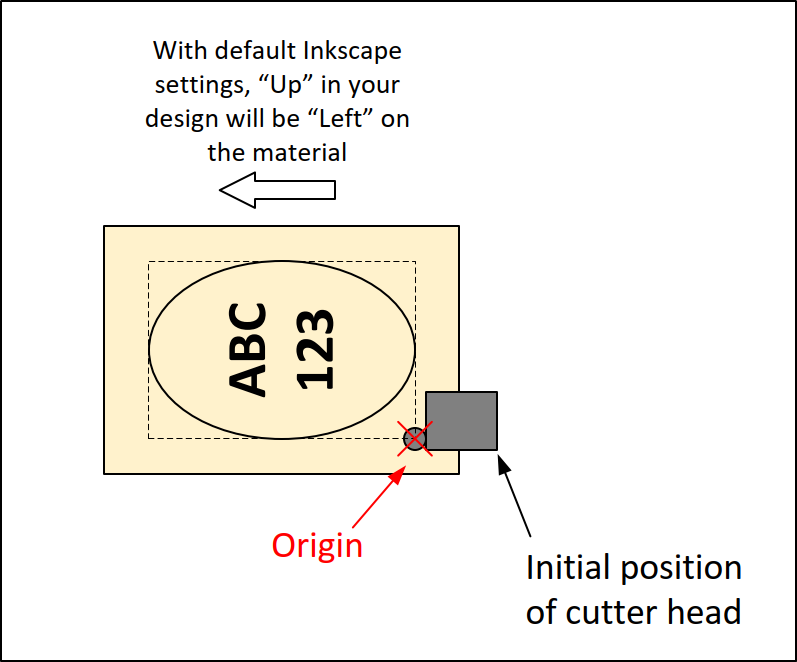
- The origin point is at the bottom left corner of your work.
- With default Inkscape settings, your work will come out rotated 90 degrees.
-
Make a test cut
- Refer p24 of the US Cutter Manual
- This cuts out a built-in test shape - a little triangle inside a square. ▶️
- You are aiming for a "kiss cut" that cuts through the vinyl, but not through the backing paper.
-
Adjust cutting speed and cutting force settings as required
- Each material will need different settings for cut speed and cut force.
- See page 25 of the US Cutter manual for suggestions on how to adjust cut speed and cut force.
- See page 14 of the US Cutter manual for what buttons to press.
- The white vinyl we have a bulk roll of cuts well at 100 mm/sec cutting speed and 150g of cutting force.
- Keep cutting the test pattern ▶️ until you find settings that work for your material.
¶ Setting up your file in Inkscape
Inkscape comes with the plugin required to drive the vinyl cutter.
Most of the work is in file preparation.
- Load your file in Inkscape.
- For tutorial purposes, load the file
\\filer\shared\Resources\branding\artifactory_logo\eps\Artifactory_All_COMBO-HORIZ_ORANGE.svg.
- For tutorial purposes, load the file

- Change to outlines display mode:
View > Display Mode > Outline.

- Check for outlines which look like they've been doubled up. In this case, the "A" in the Artifactory logo looks suspect...
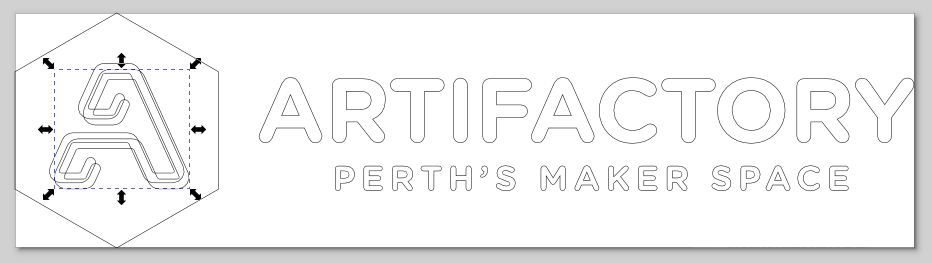
- Delete any overlapping shapes.

-
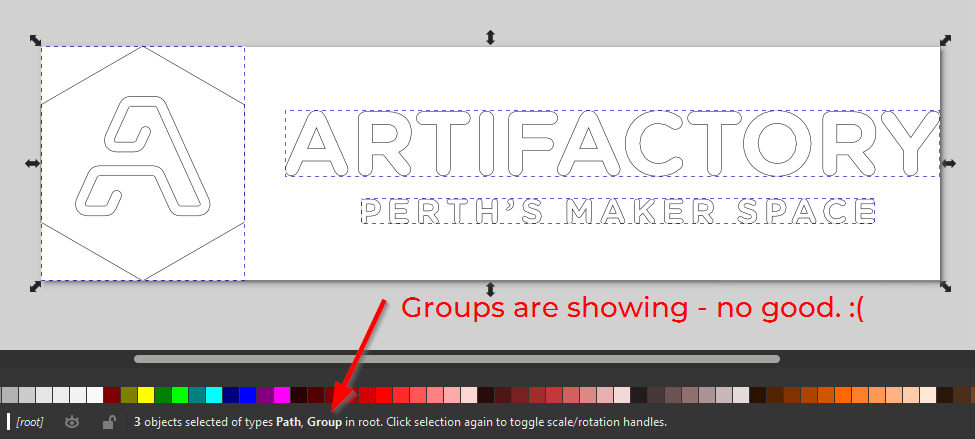
Convert everything to individual paths.
- Groups of shapes will not print. Use Ungroup (
Ctrl + Shift + G). - Shape objects like
Rectanglewill not print. Convert them to paths. (Path -> Object to PathorCtrl + Shift + C). - Text objects will not print. Convert them to paths. (
Path -> Object to PathorCtrl + Shift + C). - Strokes will not print. Convert them to paths. (
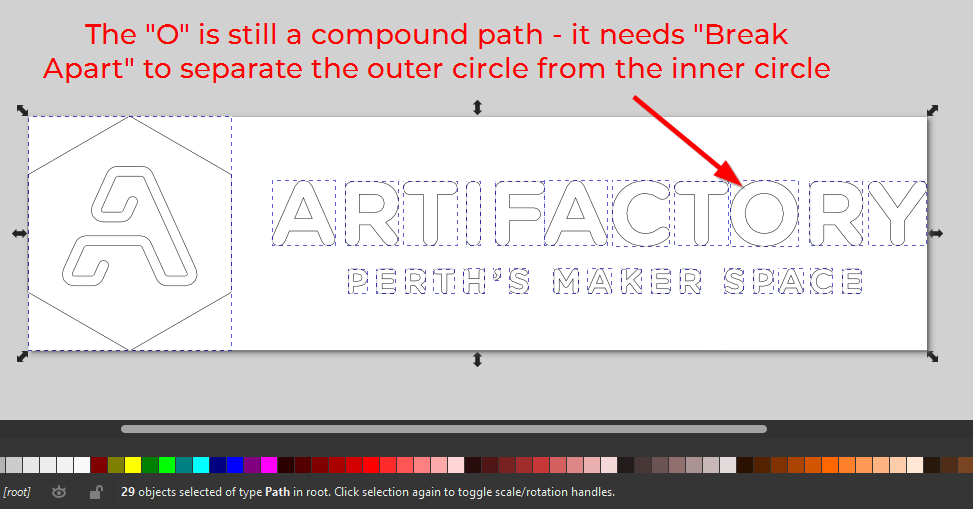
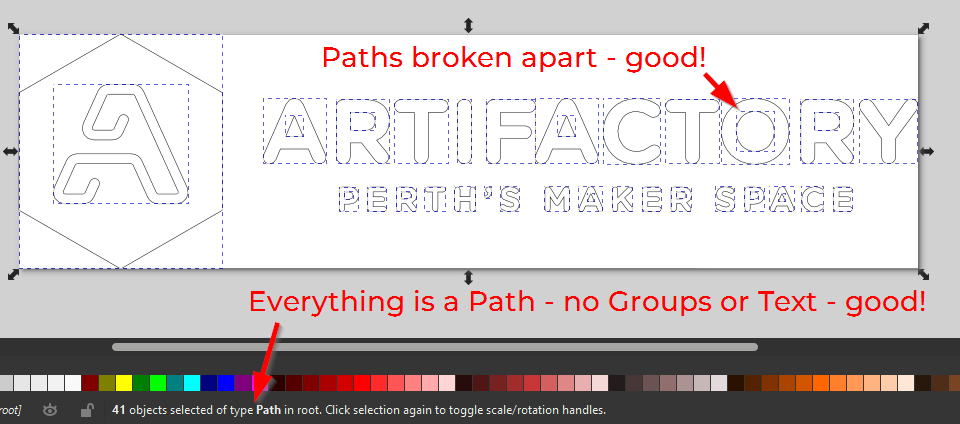
Path -> Stroke to PathorCtrl + Alt + C). - Compound paths (a path that has more than one path in it) will not print. A classic example is the letter "O" which has an inner circle and an outer circle. Break these into individual paths using (
Path -> Break ApartorCtrl + Shift + K).
- Groups of shapes will not print. Use Ungroup (
-
Repeat the above operations (Ungroup, Object to Path, Stroke to Path, Break Apart) until only paths remain.
- You should see only "Paths" in your status bar after Selecting All (
Ctrl + A).
- You should see only "Paths" in your status bar after Selecting All (
- Check the size of your design.
- The machine prints "actual size" so that 1 mm in your Inkscape file will translate to 1 mm on your material.
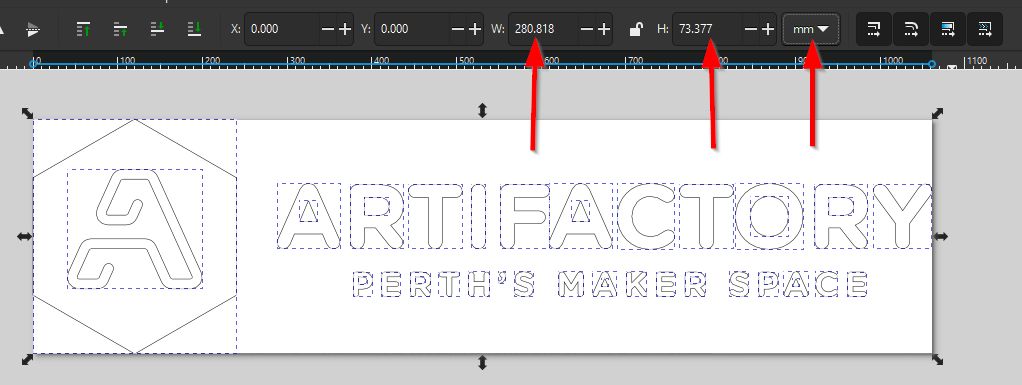
- For the purposes of this tutorial, resize the work to 100mm wide.
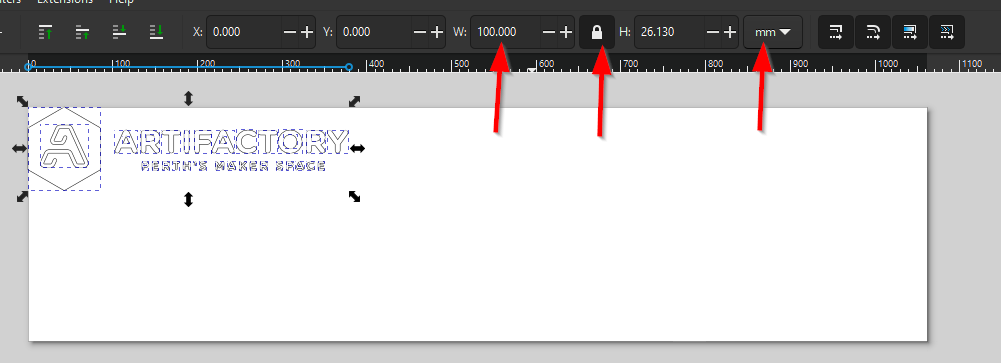
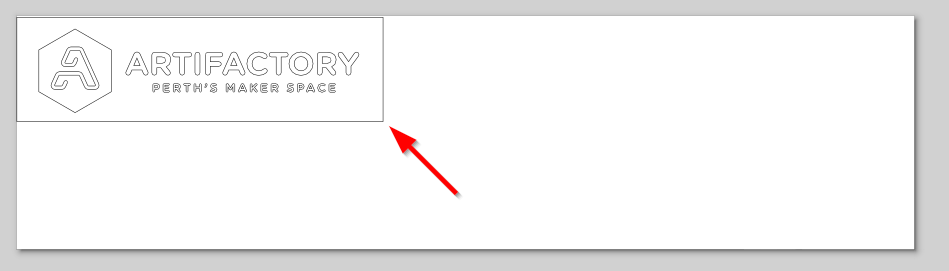
- Draw a box around your work so it will be easy to separate from remaining material.
- Remember to convert anything you draw in Inkscape to a path! Rectangle objects are not paths. Use
Path -> Object to Path(Ctrl + Shift + C).
- Remember to convert anything you draw in Inkscape to a path! Rectangle objects are not paths. Use
¶ Send the file to the vinyl cutter
-
Turn on the power to the Vinyl cutter. (Power switch on left hand side.)
-
Make sure the USB cable is connected between the PC and the vinyl cutter.
-
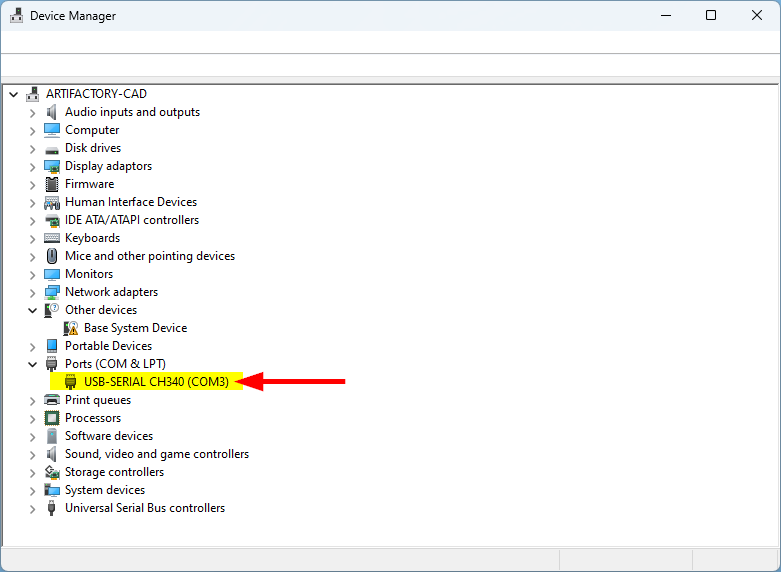
Use Device Manager to check which COM port the vinyl cutter is connected to. (In the screenshot below, it's COM3). This may change each time the vinyl cutter is turned on.
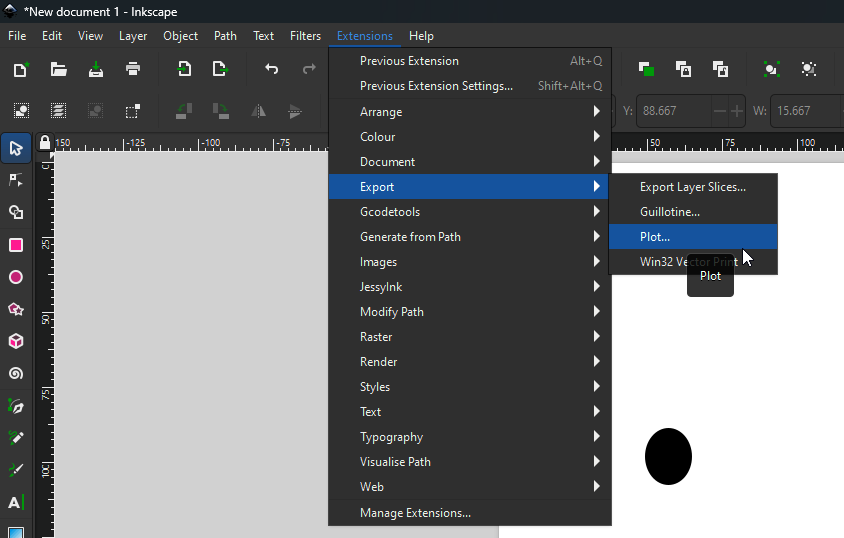
- In Inkscape, use
Extensions > Export > Plot.
- Set
Connection Settings > Serial Portto match the COM port found in Device Manager.
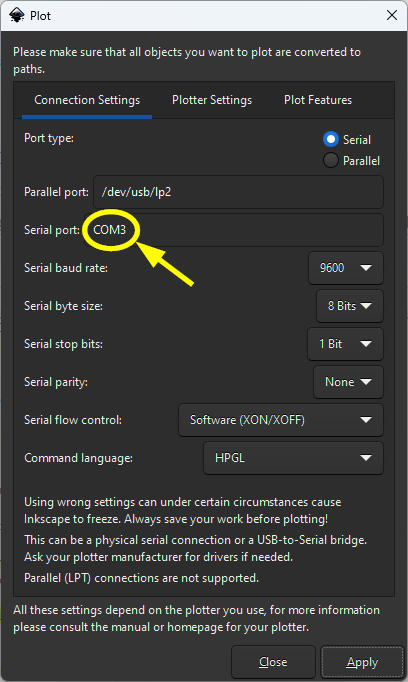
- Leave all other settings at default. The default settings are shown below.
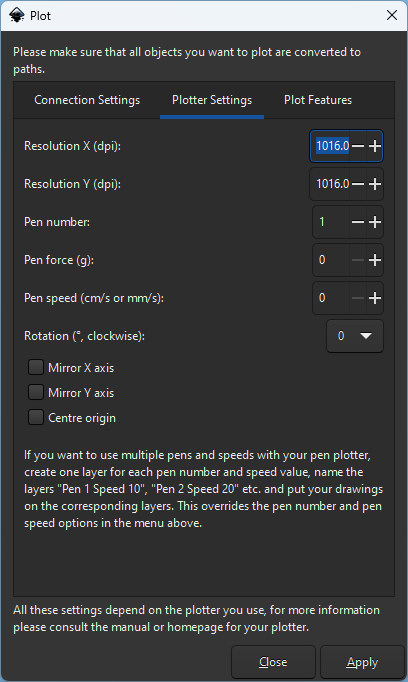
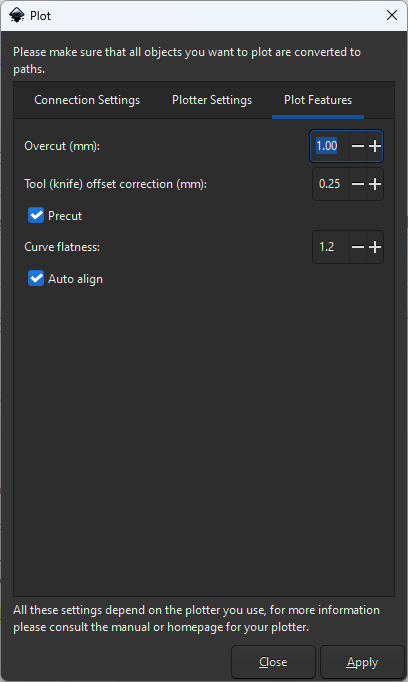
-
Final checks
- Everything is a path
- Size of design is correct (1 mm in file = 1 mm on material)
- Orientation of file is correct ("Up" on the page will become "Left" on the material.)
- Cutting speed and cutting force set
- Cutting head positioned & origin set at bottom left corner of material
-
When ready to cut, press the "Apply" button. This sends your file to the vinyl cutter!
-
The vinyl cutter will start working after it has received all data.
-
Congratulations! You've cut vinyl!
-
Unload your material from the machine and turn it off.
¶ Vinyl cutter instruction video
This video is good except for the following:
- References to there being "2 versions of Inkscape installed" on the PC - there is now only one version of Inkscape installed (and it is the correct version).
- Manually moving the head to the starting position of the cut - don't do this. Use the controls on the machine in "Offline/Pause" mode instead. See Page 22 of the US Cutter manual.
https://perthartifactory.slack.com/archives/C016CJDSD18/p1667951554973389
https://perthartifactory.slack.com/files/UDQRD3FT9/F04AFKVH22V/vinyl_cutter.mp4
¶ Maintenance
¶ Maintenance instructions
- Refer to the US Cutter manual.
¶ Consumables
The consumable spare parts for this vinyl cutter are cheap and readily available.
- Spare blades: Generic 2mm diameter, carbide tipped "vinyl cutter blades". Typically available from AliExpress. Blades should be at most $1.00 each in packs of 10.
- Cutting strip: Replace when it gets grooves in it.